3D Research Assignment
Given that I am beginning to use 3D modeling within concept designs
now, I thought it would be best to find tools within Maya that will aid me in making
the process faster, since concepts must be finished quickly. In my previous attempts
at mixing both 3D and 2D, I found the most time-consuming step by far was creating
the lineart on top of the model for the
2D image. Due to 3D allowing me to create more interesting buildings without
worrying as much about perspective and size consistency, the designs can now be
more complex than anything I’ve made before. Because of that, lineart and
shading have now require more time given to them. I decided to study Toon and
Line rendering in Maya to speed up this process. My aim is to be able to create
finished concepts within the time of 3 days, which is industry standard. Day 1
is for ideation and base modeling, and days 2 and 3 are for rendering,
painting, and presentation.
Step 1) Inspiration and Sketches
So my obsession with art nouveau is not over and I wanted to
work on a simple design for this research project so I decided to make a gate
or entrance that is inspired by the style.
Below you can see my Pureref images as inspiration and reference along
with my initial sketches.
Step 2) Modeling
Here is the final base model in Maya. While it was fairly
quick to put together, the little curly details add a lot of time to this. Overall
it was less than one day’s worth of work, which is within the time budget. I
placed a directional light to create shadows that will be visible in the
render.
Step 3) Rendering
Ok here we go. So in order to get started with Toon
rendering, I have to set the Rendering menu bar and select Toon.
On the drop down menu there are a few options, but first we
have to give the model a Toon shader. I clicked on the gemstones and in the drop
down menu I clicked “Assign Fill Shader” then gave them all the “Shaded
Brightness Three Tone”
It is currently too cartoony for the look I want it to have
so I went under Color> Interpolation and selected Spline for each color.
After messing around with different settings and colors, the
gemstones ended looking like this.
I continued these steps with all the pieces and ended with
these colors.
Next I went to create the linework. First I needed to select
the pieces I wanted outlined, then Clicked Toon>Assign Outline>Add New
Toon Outline.
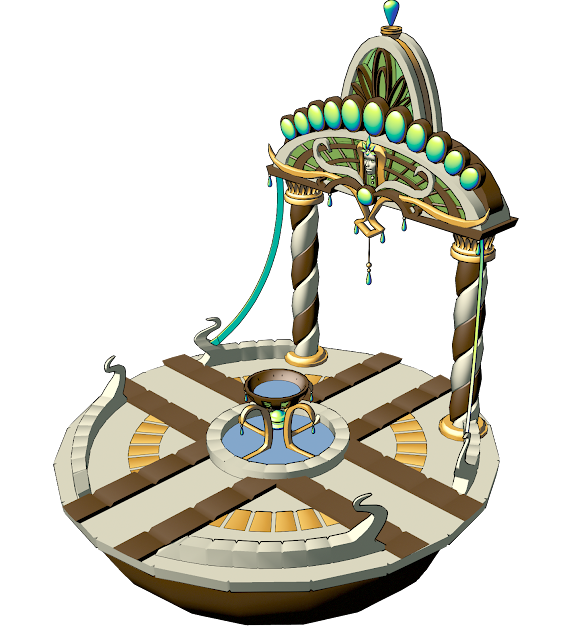
At the default settings it is not very noticeable from this
distance so I decided to change some settings to get this.
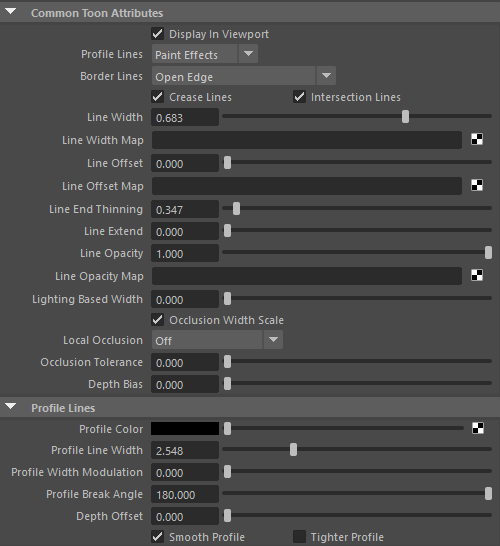
After messing with the line width and attributes, I ended up
with these settings.
I then went into the
Maya Render View and Rendered the base pass as a PNG for the model.
Then through Arnold, I rendered the following passes: base,
lighting, AO, normal, and UV.
I thought the UV render had cool gradients and could be useful.
Issue I ran into: I originally wanted to include a more
illustrative style for the line render, specifically a style like this.
I was trying to follow an article that explained how to create
it made by Maya but I found it to be unclear about some things and could not
figure out how to achieve this look on my model. I could not find another tutorial
that covered this specific topic so I decided to head another route.
I had several guesses as to why this was not working or me, excluding that the
tutorial was not clear for me. I think the render style I was aiming for needed
a much higher detail model than the one that I have, like something imported
from Zbrush. If this is the case then it would be faster and easier for me to
include these details in Photoshop than to export this to Zbrush, sculpt, and
import again.
I also just had a lot of issues getting the Toon Render to show properly in Arnold
I also just had a lot of issues getting the Toon Render to show properly in Arnold
Step 4) Photoshop
After passing everything into Photoshop and giving the Arnold
Render the right layer effects and opacity, it looked like this.
From here on, the remaining work had to be done by hand.
Thankfully, the mixture of Toon and Arnold renders saved me a ton of time from having
to do linework or rendering shadows, so now I just had to focus on creating
textures and adding details.
Here it is finished!


No comments:
Post a Comment